
Nutanix Foundation of Intel Nodes
Intel Datacenter Blocks
If you are here reading this, I am guessing that you are aware of Intel DSG servers and how great they are. What I like about Intel is the availability of the latest processor and storage, familiarity and simplicity of the platform, ease of management and the competitive pricing. These benefits however do come with one disadvantage. At the time of writing, Intel ships its Nutanix nodes bare metal.
Until recently, NX platform outside the United States was also shipped as bare metal due to Supermicro not having software export license. This meant that NX Hardware couldn’t be auto-discovered if you are a Nutanix customer outside the US. However this was later resolved with a zero value Nutanix Discovery OS pre-installed in NX hardware that allows foundation to auto discover the nodes and run foundation. While we can hope that in future Intel nodes ships with a Hypervisor/CVM or Discovery OS that allows foundation to auto-discover, until then we will have to do some manual work to foundation these servers.
I have heard of many people having issues with running the Foundation on Intel servers. While the foundation process is as smooth as other hardware, a few additional steps needs to be done prior to starting foundation. The below steps always worked for me.
Before you start
Have a keyboard and monitor with VGA connected to the server. Have your foundation set up ready and connected.
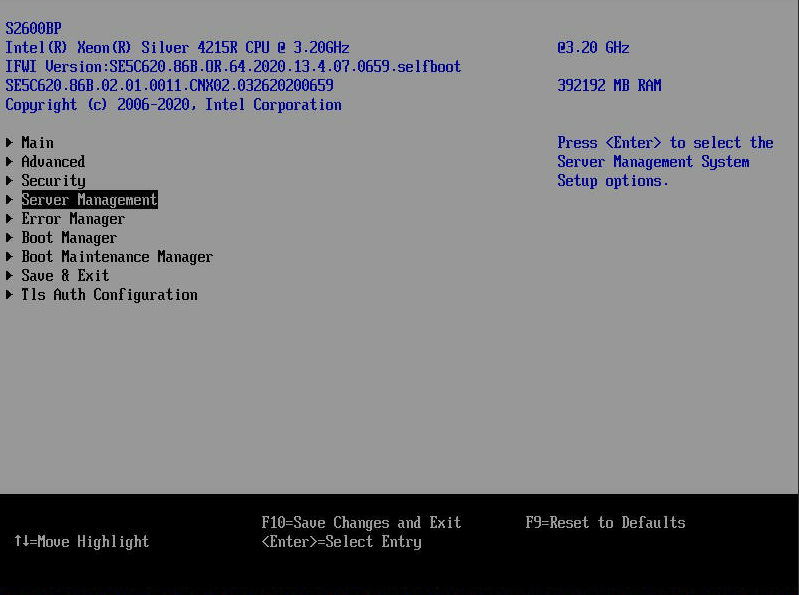
Once the monitor and keyboard are connected to the node, power on the node. And enter BMC configuration. These configurations need to be done on all nodes.
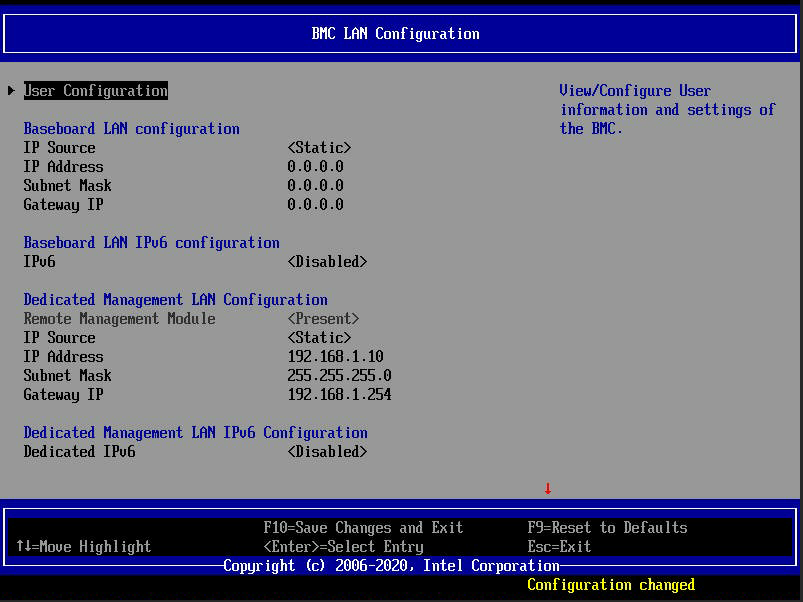
Manually setup an IP address to the dedicated Management LAN interface. This is the IPMI interface of the Nutanix node.
Server Management > BMC LAN Configuration >Dedicated Management LAN Configuration
IP SOURCEIP ADDRESSSUBNET MASKGATEWAY IP
If you are using IPv4, disable IPv6 option which will enable the IPv4 section to be configured.
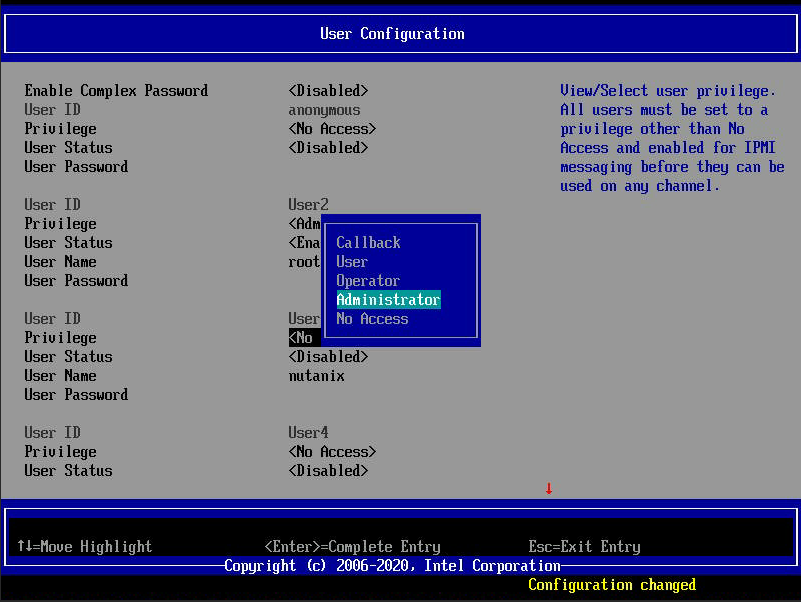
Create an account for IPMI. This account will be used to perform foundation. This can be done by enabling one of the in-built User ID as ‘Administrator’
Server Management > BMC LAN Configuration > User Configuration >User 3
AdministratorEnabledUser NamePassword
Note: At the time of writing, Foundation has issues with some special characters in the BMC password for imaging. Foundation fails with an error when some special characters are used. Try using a password similar to ‘ItIsAFineSunday’ rather than ‘Nut4n!x4/U!’. The password can be changed using IPMI commands later.
Screenshots


If you don’t have a monitor and keyboard, you may run a DHCP server from which the IPMI (Intel BMC) interface will receive an IP address. The DHCP Server can be a virtual machine bridged to the foundation laptop’s interface.
If you are using this method, remember that each node has a different password set for IPMI login.
Default UsernamerootDefault PasswordMAC address of BMC Interface
Using the IP address assigned by DHCP server, you can login to web interface and do the IP changes mentioned above. This can be done either through the configuration options in the GUI or by opening the iKVM.
Once the IP addresses and user accounts are created, make sure you can login to the web interface via your foundation VM. After confirming the login of all servers, you may start the foundation process.
The Don’ts
DO NOT upgrade the firmware manually. Use Nutanix LCM to upgrade all firmware.
DO NOT reset BIOS to default settings. The Intel nodes validated for Nutanix comes with settings pre-configured. By resetting to default, these will remove Nutanix specific settings and will cause foundation to fail.
Nutanix Specific Settings
If you did reset BIOS to default and want to change the setting to Nutanix specific, please follow the table below
| BIOS Option | Default | Change |
| Custom BIOS Revision | NA | NX02 – These setting are programmed as the default in the Nutanix BIOS |
| Advanced > Integrated IO Configuration > Intel(R) VT for Directed I/O | Disabled | Enabled |
| Advanced > Integrated IO Configuration > ACS Control | Enabled | Enabled |
| Advanced > Integrated IO Configuration > Coherency Support | Disabled | Enabled |
| Advanced > Memory Configuration > Memory RAS and Performance Configuration > ADDDC Sparing | Enabled | Disabled (setting only available when using 4x DIMM) |
| Advanced > Power & Performance > Hardware P States > Hardware P-States | Native Mode | Disabled |
| Advanced > Processor Configuration > Intel(R) Virtualization Technology | Disabled | Enabled |
| Server Management > Resume On AC Power Loss | Stay Off | Last State |
| Boot Maintenance manager > Advanced Boot Option > Boot Mode | UEFI Boot | Legacy |
| Advanced > System Acoustic and Performance Configuration >Set Fan Profile | Acoustic | Performance |
These are BMC settings which need to be made in F2 BIOS setup and BMC EWS GUI.
| BMC Options | Default | Setting |
| Server Management > Resume on AC Power Loss | Stay Off | Last State |
| Server Management > BMC LAN Configuration > User Configuration >User 3 | Disabled | Administrator Enabled User Name Password |
| Server Management > BMC LAN Configuration >Dedicated Management LAN Configuration | Blank | IP SOURCE IP ADDRESS SUBNET MASK GATEWAY IP |
| Encryption cipher 3 Must be set in the BMC Web GUI or with IPMItool | Disabled | Enabled |
Foundation Still Fails
If you have done all these and your foundation still fails, it could be due to your foundation VM hosts’ MAC table.
If this happens, disable all interfaces on your laptop, including the Virtual Box interfaces and then shutdown Foundation VM and reboot the laptop. After reboot, enable only the physical interface of the laptop and the Virtual Box interfaces. Power on the foundation VM and retry foundation.